 |
| Picnic Time Mariposa Cutting Board |
 |
| Rand McNally Tripmaker RV GPS. |
 |
| Picnic Time Mariposa Cutting Board |
 |
| Rand McNally Tripmaker RV GPS. |
 |
| Bauer RV NE Electric Door Lock |
 |
| Bauer EM Electric RV Door Lock |
 |
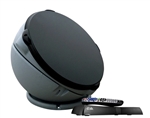
| Carryout Anser Portable Satellite Antenna |
 |
| Jensen JRV210B SIRIUS Ready 2.0 DIN Stereo |
 |
| Doran Tire Pressure Monitor |
 |
| Flag Pole Buddy |
 |
| Rand McNally TripMaker RV GPS |
 |
| When Pigs Fly |
 |
| ScanGuageII |
 |
| RV Die Cast Collectible |
 |
| Highlander Picnic Basket |
 |
| Sportula Grilling Spatula |
 |
| Panini Pie Iron |
 |
| RVupgrades RV Accessories Gift Card |
 When you’re camping, there’s nothing quite like sitting around a campfire to make you relax at the end of the day. Unfortunately, many areas regularly have burn bans in place that prohibit campfires from being started, even inside of metal fire rings. The answer is a propane fire ring, one of the most innovative RV accessories on the market today.
 Looking for an interior ventilation system that is powerful, versatile, durable and easy to operate? Then Maxxair Maxxfan Deluxe Ventilator may just be the ideal for your situation. It features a 10 speed fan that’s capable of circulating 900+ cubic feet of air per minute. As far as versatility goes, it can be used as an exhaust, intake or ceiling fan. We also happen to love the flush mounted keypad, removable insect screen and warranties that come along with it.
.jpeg) If the stink is coming from your campers holding tank, Camco’s Cyclone RV Sewer Vent would a wise investment too make. What we like about the vent is that it is simple to install and requires no electricity. It operates on wind power instead. So it will remain an efficient and effective method of odor control no matter where you decide to park your RV.
If the stink is coming from your campers holding tank, Camco’s Cyclone RV Sewer Vent would a wise investment too make. What we like about the vent is that it is simple to install and requires no electricity. It operates on wind power instead. So it will remain an efficient and effective method of odor control no matter where you decide to park your RV. Odor eliminating sprays and canisters are another set of products beloved by our RV parts supplier pros. Each one is designed to abolish scents from the air as well as fabrics. This includes odors generated by pets, cooking activities, holding tanks, clogged drains and garbage cans.
 RV Laundry Accessory #1: Prime Products Hamp Bag
 Of course washing dirty clothes is one thing and drying them is another. When it comes to that task, you may want to buy a Smart Dryer Telescopic Clothes Dryer. Constructed out of stainless steel, it weighs less than 15 pounds and may be attached to the back of your RV. Because it weighs so little and folds up into a 6 inch wide form, there is no need to be concerned about added drag.
 Motion detector security systems are one of the best ways to protect your campsite from intruders. Take WestOZ Portable Wireless Motion Detection Security System for instance. It features a passive infrared motion detector sensor that is capable of securing a 150 degree pattern with a 30 foot range. The system can even be controlled remotely with a handy key FOB. We should also point out that if someone does try to breach the system, an 115db interior siren will sound off immediately.
It's the time of year to winterize your RV and store it until the spring. If your RV will be living outside and facing the elements for the next few months, you should use a cover to protect it. There are many options when decided what kind of cover to get, so we put together a quick guide to make the decision easy. If you have any other questions you can always get in touch with us through email or our Facebook page!

The most obvious consideration to make when buying a cover is making sure you're getting the correct size and type for your RV. Your options are:
There are also covers for other parts of your RV that might need protection both in the winter and periodically throughout the year. At RVUpgrades.com we also carry:
Deciding on what type of material is necessary for the climate you live in is a crucial component of purchasing an RV cover. Covers are available in a few different materials depending on brand.
If you have any questions, please get in touch with us at RVUpgrades.com so you can be sure your RV will be properly protected all winter!
 Don’t want to miss your favorite football game this season? RV News is currently showcasing the new Winegard Pathway X2 portable satellite high definition TV antenna. The new antenna is being offered in partnership with DISH and delivers a true HDTV viewing experience for mobile or outdoor activities such as RVing, tailgating and camping. The new antenna is powered by a DISH receiver, which is sold separately.
With winter about to hit, many of you will be storing your RV for the season. Whether you're planning on storing your RV in a garage or outside, there are a few steps you should take to winterize your RV before you leave it to sit for an extended period of time. Follow these steps and your RV will be ready for your first road trip of spring!
Winterizing an RV primarily involves making sure the water and drainage lines are prepared for cold weather so they don't get damaged. Start by draining the fresh water tank as well as the gray and black holding tanks. This should be done at a sanitary dump station so waste gets disposed of properly. You will also want to clean out the black tank.
It's important to make sure the water heater is not hooked up or hot when you are draining the water heater. Once the heater is cool, bypass the water heater and remove the cap and drain the heater.
Open all hot and cold faucets in your RV to drain any remaining water in your system. Don’t forget the toilet, shower, and any other water system you have that has a valve.
Use a blow-out plug attachment with an air pump or compressor to completely clear out your lines of water. Once all water has been blown out of the lines, replace the caps on your drains and close any faucets and valves.
Depending on where you live, putting anti-freeze in your water lines may not be necessary. If your RV will regularly be exposed to below freezing temperatures, however, you will want to add anti-freeze to the lines so they are protected.

To pump anti-freeze into your lines, install a bypass valve, such as the Camco Pump Converter on your water pump and pump anti-freeze directly from the bottle through your water system.
Turn on the cold water of your valves and faucets and wait until anti-freeze begins to come out. Repeat this for the hot water as well. Make sure you flush the toilet as well and leave a bit of anti-freeze in the bowl. Also pour a bit of anti-freeze into your drains.
And that's it! Your water system will now be protected against freezing temperatures throughout the winter and you won't have any unpleasant surprises when you prepare your water system for the spring. Visit our winterizing page for our entire selection of RV winterizing products and please don’t hesitate to get in touch with us via email, Facebook or a leave a comment if you have any questions!
 The fourth RV interior light that would be suitable for a late night read is manufactured by Ming’s Mark. It is a LED tube light that is 6” wide, 19.7” long and a modest 1.42” high. The light is capable of generating 3x200 lumens and requires 8 to 30v DC.